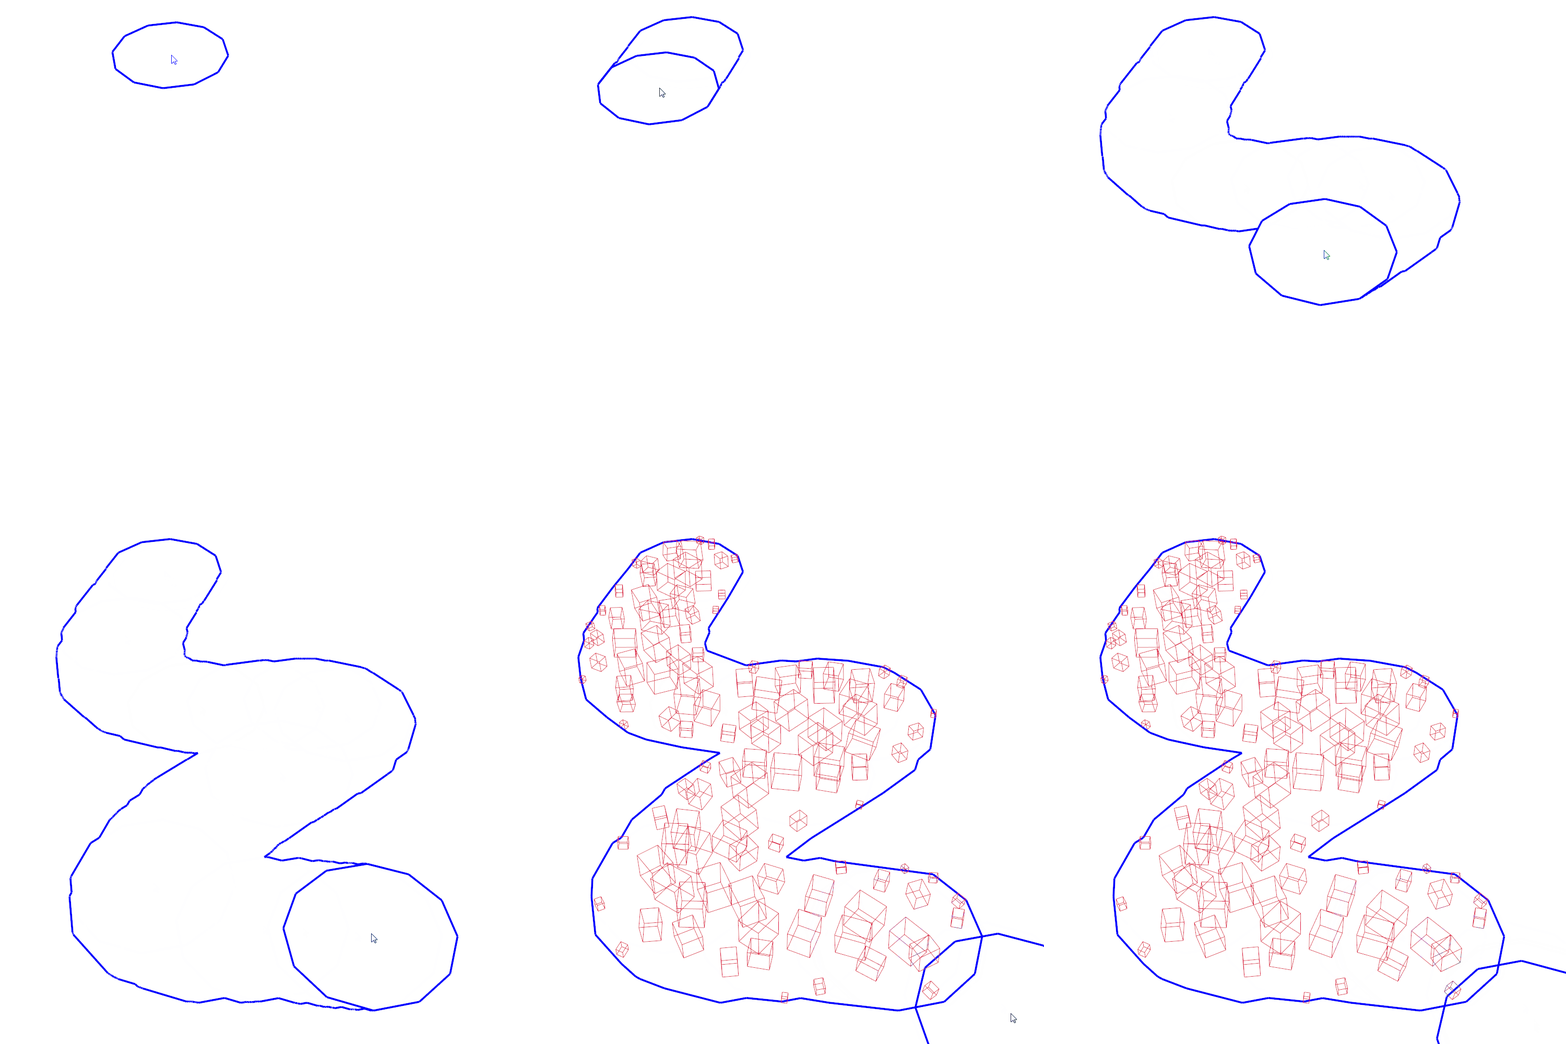
Paint Areas have always been one of the major features of Skatter v1. If you’re not familiar with them, here’s a quick illustration:

It was quite revolutionary when we first introduced it, but over time it has shown its limitations. Mainly, it is 2D only. It’s good enough when you work on a somewhat flat terrain, but when you try to work on more complex 3D surfaces, it can be almost useless. Paint Areas could only be used in “Projection” mode. Skatter would prevent you from using them when you switched to “Wrap (UV)”.
So for Skatter v2, we knew we needed to do better. We needed a 3D Paint Mask! (By the way, we are renaming “Clipping Areas” to “Masks” in Skatter v2) Going 3D allows for the Paint Masks to work in every situation, whatever the host shape, the distribution mode, etc.
This proved to be a very complicated endeavor. There were many challenges to overcome: storing the mask shape, modifying the shape in real-time, displaying a useful preview to the user, etc.
How it worked in Skatter v1
In Skatter v1, the implementation was quite simple. Under the hood, the Paint Area is pretty much what you see on-screen. It’s composed of series of connected lines that form a contour. If a contour is nested inside another contour, then it is a hole. A contour is created by doing boolean operations in real-time. Whenever the cursor moves, we create a circle around it and add or substract that circle to the existing contour shape. That’s it! The contour is stored as-is.
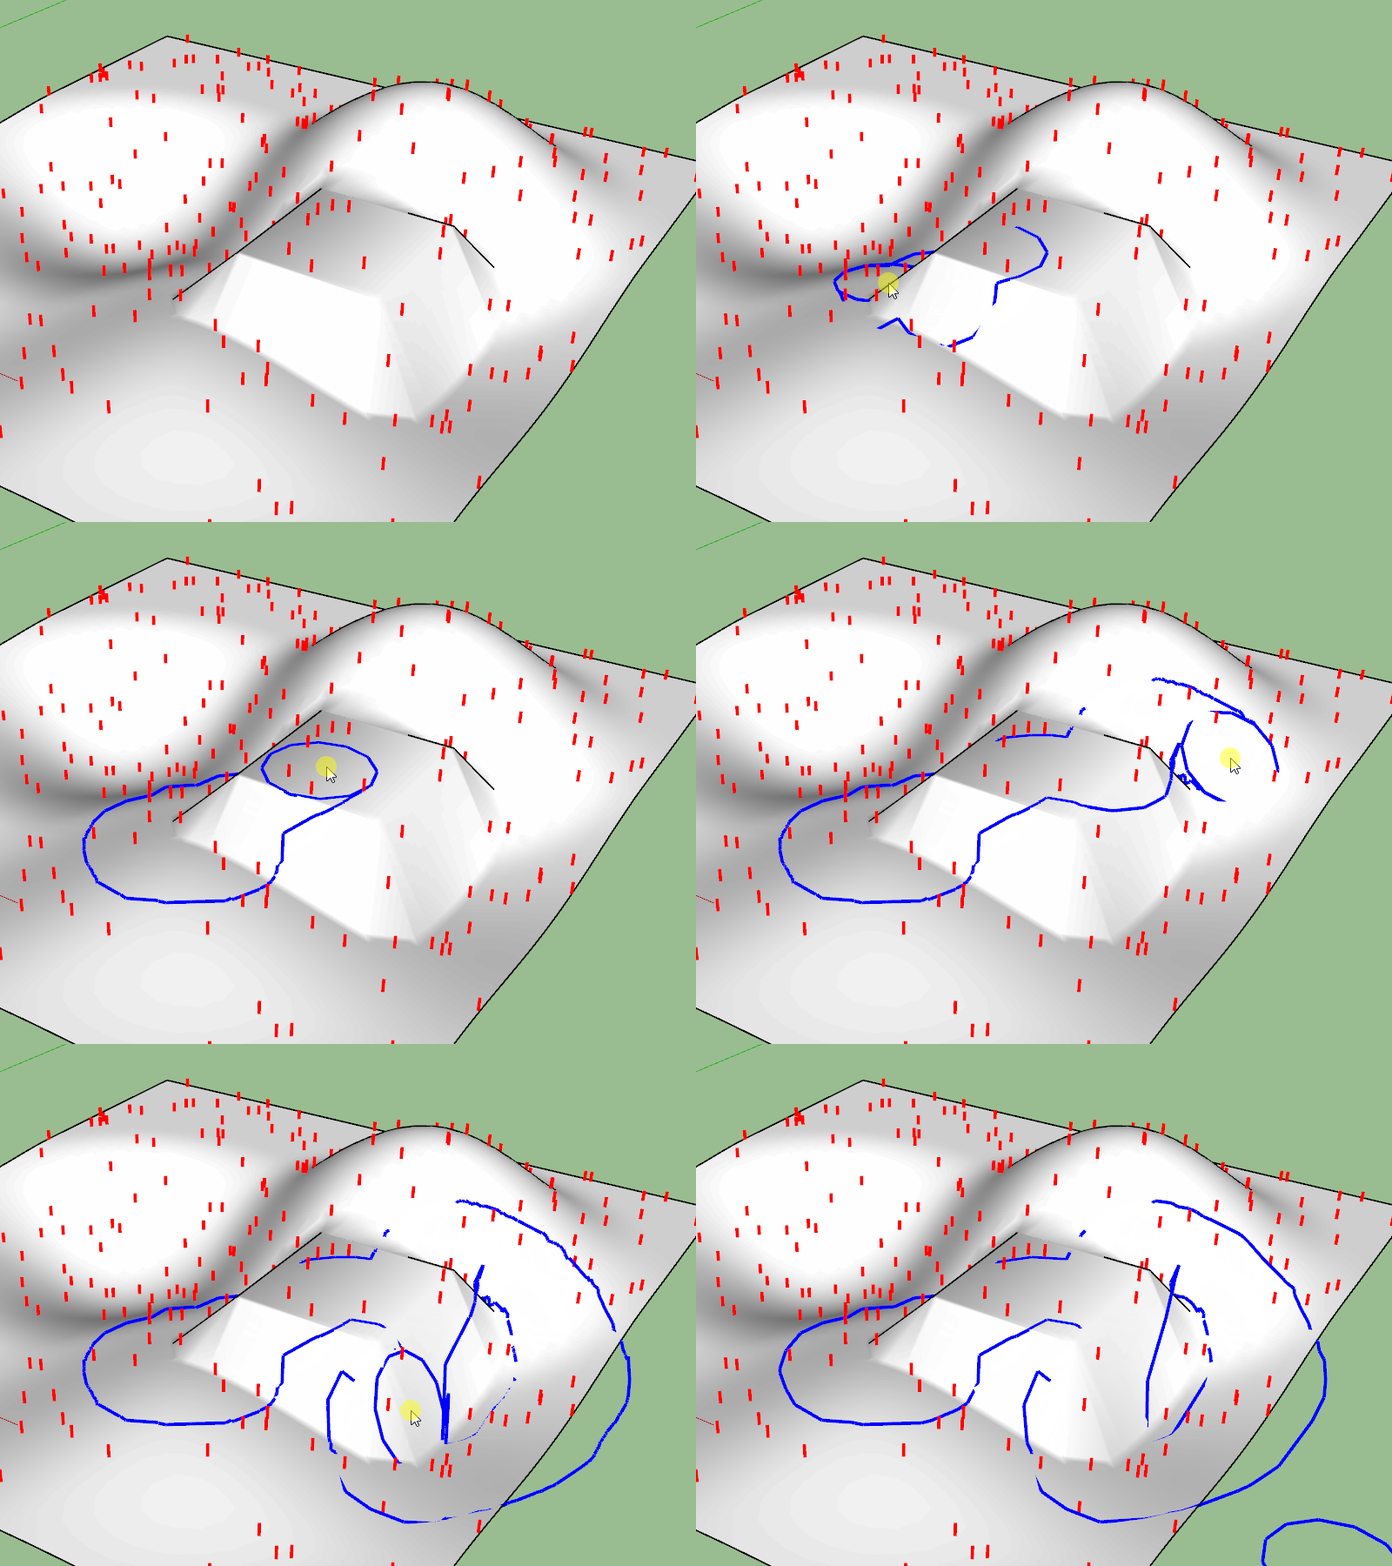
This implementation works fine and it’s very fast to compute. But as mentioned earlier, it only works in 2D. And another issue is that it is completely decoupled from the host geometry. For example, if you are working on a terrain, add a Paint Area over that terrain, and later modify the terrain shape, the Paint Area will not follow.
What we did for Skatter v2
We couldn’t simply take the naïve v1 implementation and make it 3D. Boolean operations in 3D, whilst doable, are much more complicated to do correctly. But most importantly, it would have been very difficult to deal with nested contours (in 3D, they are not really contours anymore, but full 3D meshes).
Then we tinkered with another ideas: automatically UV-unwrap the host geometry and draw a black&white virtual texture. But it would have been a nightmare to handle changes in the geometry, falloffs would be complicated if not impossible, the texture could not be displayed before SketchUp 2020 due to limitations in the Ruby API, and other smaller technical challenges.
We settled on a hybrid solution: under the hood, instead of storing the contour or the shape of the mask, Skatter records the brush “strokes” (along with the brush size for each stroke) and reconstructs the mask based on these strokes. Storing the strokes is very lightweight (so it doesn’t make the SketchUp file much bigger), and it allows for several things to happen:
- Skatter can generate a voxel grid that represent the volume of the mask. With that voxel grid, it’s very fast to compute if a point is within the mask or not. It is also pretty straightforward, we don’t have to deal with nested contours.
- A 3D mesh (made of triangles) is also generated to get the distance of each point to the boundaries of the mask, to compute falloffs.
- That 3D mesh is also used for the preview. Skatter does a boolean intersection between the mask geometry and the host goemetry, to get the “footprint” of the mask on the host.
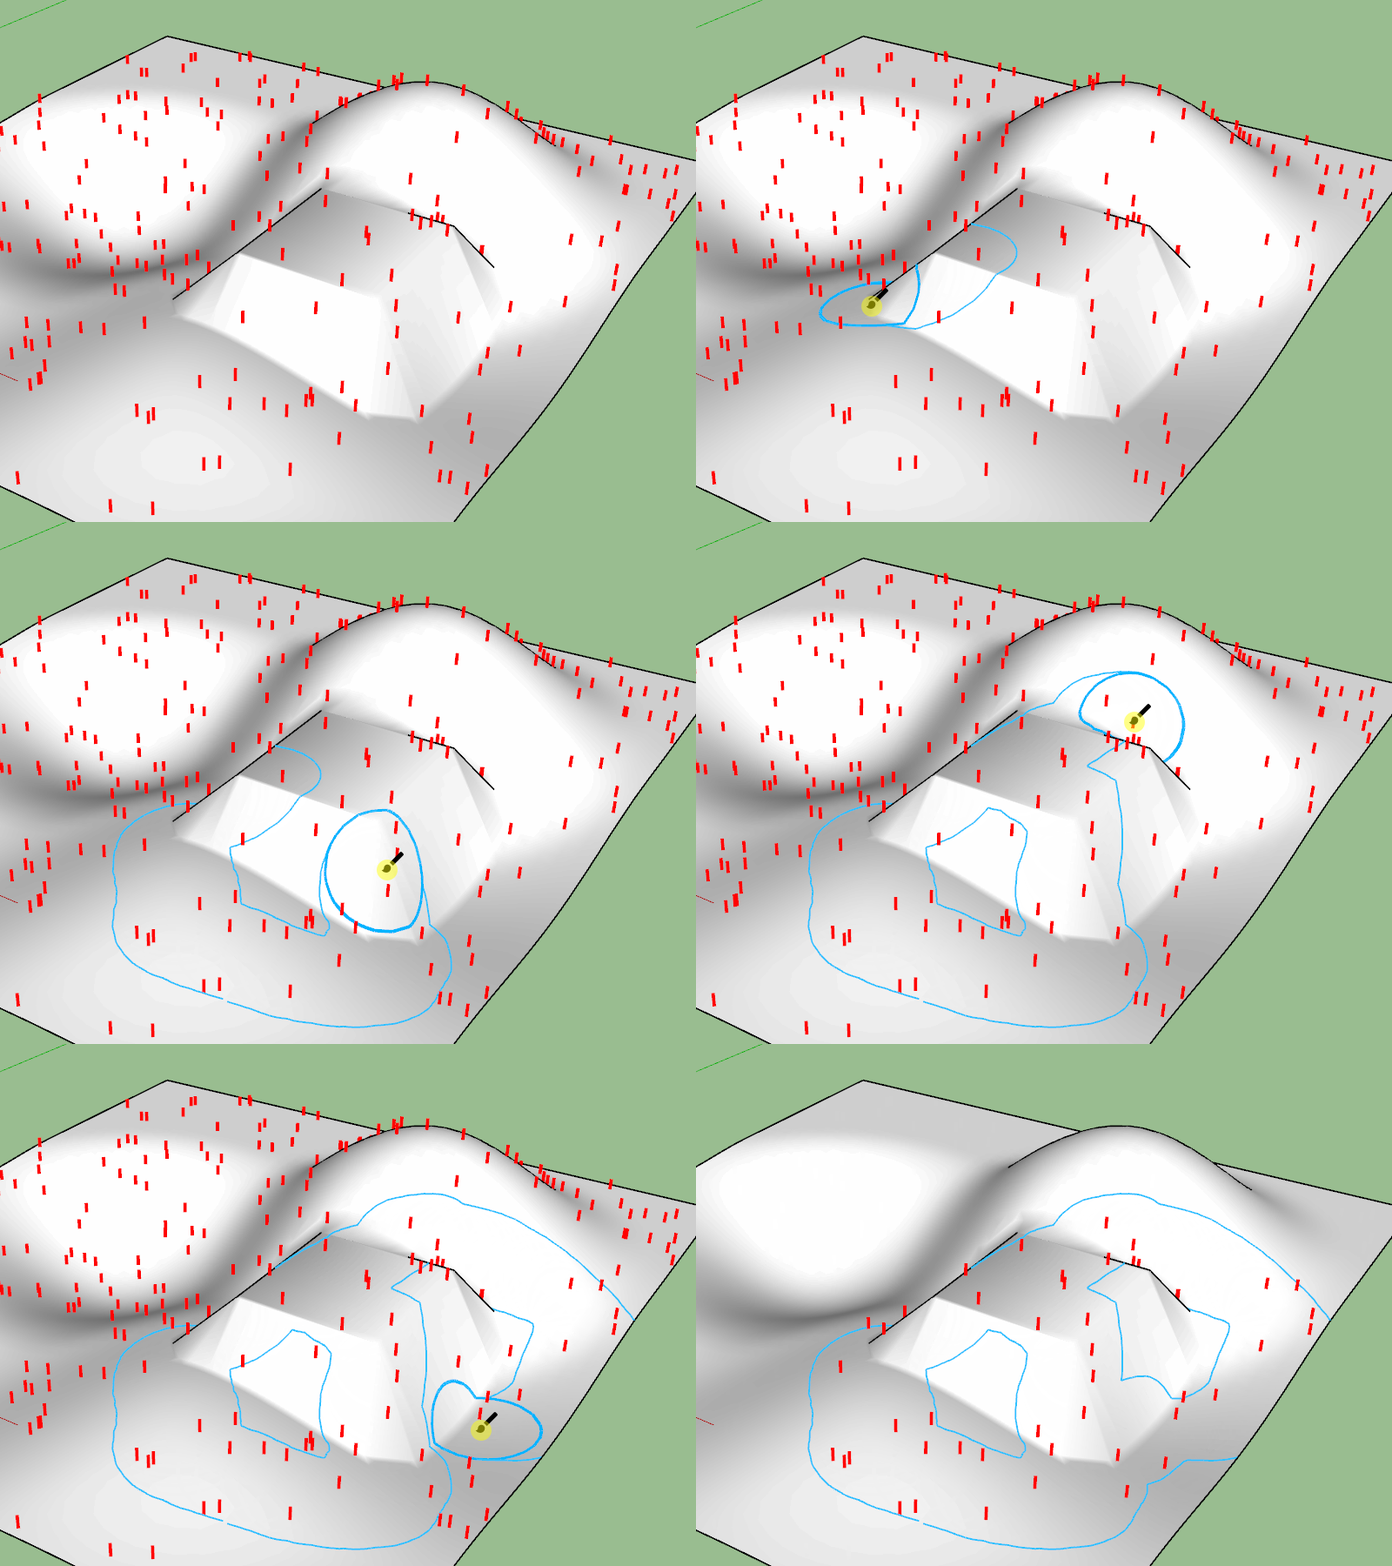
The result is a Paint Mask that works in every situation, regardless of the distribution mode or the host shape. It works on spheres, on vertical walls, on rough terrains, and of course it’s still great on flat horizontal planes. It offers a much better user experience, as the brush and mask footprints actually follow the host geometry.
Here is a comparison between Skatter v1 and v2 on a complex terrain:
| Skatter v1 | Skatter v2 |
|---|---|
 |
 |
V1 to V2 conversion?
Since both implementations are so much different, there is no straightforward way to convert Skatter v1 Paint Areas to Skatter v2 Paint Masks. So when you will convert a v1 setup to a v2 composition, the v1 Paint Areas will be converted to SketchUp faces, and used as Object Masks. The result will be the same, but it will be less editable.
Alternatively, it will be possible to run Skatter v1 and Skatter v2 at the same time, so you don’t have to convert. You can keep using your old v1 setups with Skatter v1!
